Ever dreamt of crafting your own luxurious, natural soap, free from harsh chemicals and questionable additives? The thought of making soap at home can feel a bit daunting, especially with the sheer volume of information (and sometimes misinformation) out there. Many beginners are led to believe that
Demystifying Cold Process Soap: Why True Soap Requires Lye
First things first: let's clarify what "making soap" truly means. If you're melting and pouring a pre-made base, while it's a fun craft, you're not actually making soap from scratch. Real, handmade soap involves a fascinating chemical reaction called
This fundamental distinction is important not just for authenticity, but for understanding the quality of what you're creating. Most "soap bars" you find in conventional stores aren't actually soap at all; they are often detergents, cleverly marketed and shaped to look like traditional bars. If you read the labels, many won't say "soap" but rather "beauty bar" or "cleansing bar." These products frequently contain synthetic ingredients, harsh chemicals, and unnecessary additives that can strip your skin's natural oils. By engaging in
Now, about the cost: the myth that soap making is prohibitively expensive often deters newcomers. While you can invest in high-end equipment, our focus is on smart, affordable
Essential Lye Safety for Beginners: Your Non-Negotiables
The mention of "lye" often sparks apprehension, and rightfully so. Sodium hydroxide is a powerful, caustic chemical that requires respect and careful handling. However, with the right knowledge and precautions, it's perfectly safe to use for
- Personal Protective Equipment (PPE):
- Eye Protection: Always wear safety goggles (not just eyeglasses) to protect against splashes.
- Gloves: Heavy-duty rubber gloves or nitrile gloves are essential.
- Long Sleeves & Closed-Toe Shoes: Protect your skin from accidental splashes.
- Ventilation: Work in a well-ventilated area, ideally near an open window or under an extractor fan, to avoid inhaling fumes.
- Mixing Lye Safely: Always add lye granules slowly to water, never water to lye. This is crucial because the reaction is highly exothermic (produces intense heat). Adding water to lye can cause a dangerous volcanic eruption of hot, caustic liquid. Stir gently until dissolved.
- "Lye-Safe" Containers: Not all containers are created equal for lye.
- Preferred Materials: Stainless steel is excellent. For plastic, look for containers with the recycling symbol #5 (Polypropylene, or PP). These are commonly found in empty yogurt, cottage cheese, sour cream tubs, or sturdy plastic pitchers. They will not react with or melt from the lye solution. Bonus: If you mix your lye solution the night before, you can safely pop a lid on a #5 container to prevent evaporation until you’re ready to soap.
- Avoid Glass: While technically lye-safe, the rapid and intense heat generated by the lye solution (often exceeding 200°F) can cause thermal shock in glass, leading to shattering. It's a risk not worth taking for
introductory soap making . - Dedicated Equipment: Once a container, spoon, or whisk has been used for lye, it should be permanently dedicated to soap making. Label these items clearly and store them separately from your kitchenware.
- Distilled Water is Best: For dissolving your lye, distilled water is highly preferred. Hard water or water with high mineral content can cause issues in your finished soap, such as dreaded "orange spots" (DOS - dreaded orange spots) or decreased lather. While filtered water from your tap might be okay in a pinch, a gallon of distilled water is inexpensive and provides the best results for consistent, high-quality soap.
Budget-Friendly Hacks for Your First Batch
One of the biggest hurdles for beginners is the perceived need for expensive, specialized equipment. For
- Molds: Forget expensive silicone loaf molds for your first go.
- Cardboard Boxes: A simple shoebox or clean cereal box lined with parchment paper makes an excellent, free loaf mold.
- Silicone Baking Molds: Silicone cupcake liners or small silicone loaf pans (often found cheaply at dollar stores) work wonderfully.
- Plastic Containers: Clean, sturdy plastic food containers (like take-out containers or Tupperware) can also be lined and used.
- Measuring: A reliable digital kitchen scale is your single most important investment. You cannot make soap accurately without one, as ingredients are measured by weight, not volume. You can find basic models for under $20.
- Stirring Utensils:
- Silicone Spatulas: Great for scraping bowls clean.
- Sturdy Plastic Spoons: Perfect for mixing ingredients.
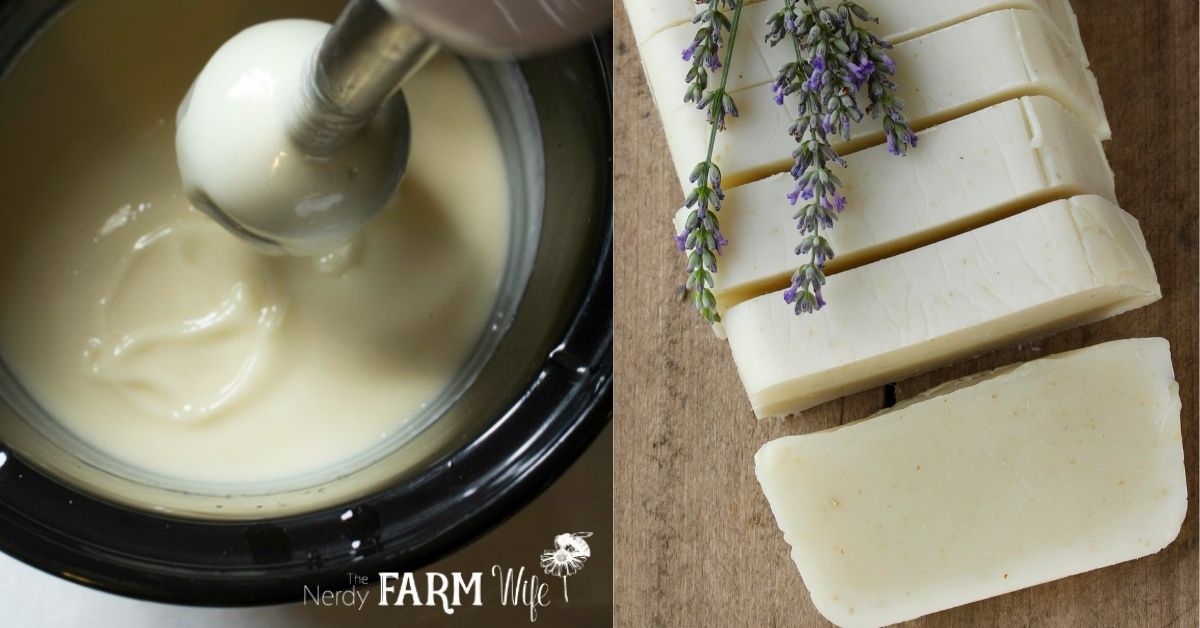
- Immersion Blender (Stick Blender): While not strictly a "free" item, a cheap immersion blender (often around $25-30) is a game-changer. It dramatically speeds up the saponification process, helping your oils and lye solution reach "trace" (when the mixture thickens like thin pudding) much faster and more consistently than hand-stirring. It's a worthwhile small investment that will save you hours of arm aches.
- Temperature Measurement: A simple digital kitchen thermometer will suffice for checking the temperatures of your oils and lye solution.
- Safety Gear: Basic rubber gloves and safety glasses can be purchased very affordably from discount stores.
Start small with your batches. Don't jump into a 5-pound recipe. A smaller, simpler recipe means less waste if you encounter challenges, making your
Choosing Your Oils: Nourishment from Nature
One of the most satisfying aspects of
The reference context highlights excellent choices, and here's a bit more about why they're so great:
- Lard or Tallow: These animal fats, when rendered from kitchen trim, are incredibly sustainable and produce wonderfully hard, white bars of soap with a creamy, stable lather. They are also often the most economical option.
- Olive Oil: A staple in Mediterranean diets and skincare, olive oil creates a gentle, moisturizing soap that's excellent for sensitive skin. It contributes to a mild, conditioning lather.
- Coconut Oil: Known for its ability to produce large, bubbly lather and hard bars. However, use it in moderation (typically 20-30% of your total oils) as very high percentages can be drying to some skin types.
- Castor Oil: A small amount (usually 3-8%) of castor oil is fantastic for boosting lather and creating a rich, luxurious feel in your soap. It also adds a conditioning quality.
- Cocoa Butter: Adds hardness, conditioning, and a lovely chocolatey aroma to your soap. It's a great choice for a more luxurious bar.
For your first
Understanding "superfatting" is also key. This means intentionally formulating your soap with a slight excess of oils that don't react with the lye. These unsaponified oils remain in the finished bar, providing extra conditioning and moisturizing properties, making your homemade soap incredibly gentle on your skin. Learn more about the amazing benefits of natural, handmade soap in our article: Why DIY Soap is Booming: Craft Natural Bars for Healthy Skin.
Conclusion
Embracing
